
|
|
The Power-io CZ2H products require the use of thermal transfer grease, when installed as a replacement retrofit. The proper installation is as follows: Make sure that the Power-io CZ2H “A02 Top Hat Assembly” and the heat sink are both clean and dry. If you have black-colored residue from a previous thermal pad, a few drops of a light weight oil, such as WD-40 and a paper towel will clean the surface. Then use a few drops of isopropyl alcohol and a paper towel to clean the surface of any oil. If you have white-colored residue from Power-io Thermal Compound, a few drops of isopropyl alcohol (rubbing alcohol), and a paper towel will clean the surface. 1) Apply 4 small beads of the Power-io heat sink grease to the “face” of the heat sink. Stay approximately 1 inch away from the sides of the heat sink face. Stay approximately 0.5 inches away from the top and bottom edge of the heat sink face. The beads only need to be approximately the diameter of a round tooth pick. The Power-io heat sink “face” and the Power-io “Top Hat Assembly” both have a machined surface, so they are extremely flat and smooth. Therefore, the small amount of thermal grease is compressed and spread out, which provides a good thermal bond. The objective is to have a THIN layer of heat sink compound that covers the majority of the surface. A thick layer of heat sink compound reduces its effectiveness. There are two small tracks in the Top Hat Assembly located near the 6 mounting screw locations. These are to absorb some excessive thermal grease, if it becomes squeezed out in that direction. 2) When installing the Top Hat Assembly to your heat sink, install the 6 installation screws. Many people will use a T-Handle Hex Key such as: Eklind part Number 51609, or equivalent. The screws should be “finger-tight”. 3) Let the unit sit for 5 minutes (as the thermal grease is compressing and spreading), and then tighten the 6 mounting screws again. This might be a quarter turn or a half turn of the screw. 4) Let the unit sit for 5 minutes (as the thermal grease is compressing and spreading), and then tighten the 6 mounting screws again. This might be a quarter turn of the screw. 5) Let the unit sit for 5 minutes (as the thermal grease is compressing and spreading), and then tighten the 6 mounting screws again. The ideal tightness is 45-60 inch pounds (very tight). If any thermal grease becomes squeezed out, if can be wiped away with a paper towel. When the Power-io CZ2H is first used, the thermal transfer grease will slightly expand and contract in order to fill in any slight scratches in the Power-io CZ2H or in the heat sink face. An example of the thermal compound installation: 3 vertical beads plus 1 horizontal bead Any excess thermal compound can be inserted anywhere in the center area. If you dis-assemble the unit, you see that you have more than 95% coverage of the thermal compound with very little wasted compound. One 25 gram tube of Thermal Compound will typically be enough for 12-14 installations. Install the thermal compound like this, and it will compress between the "top hat assembly" and heat sink, as shown below: 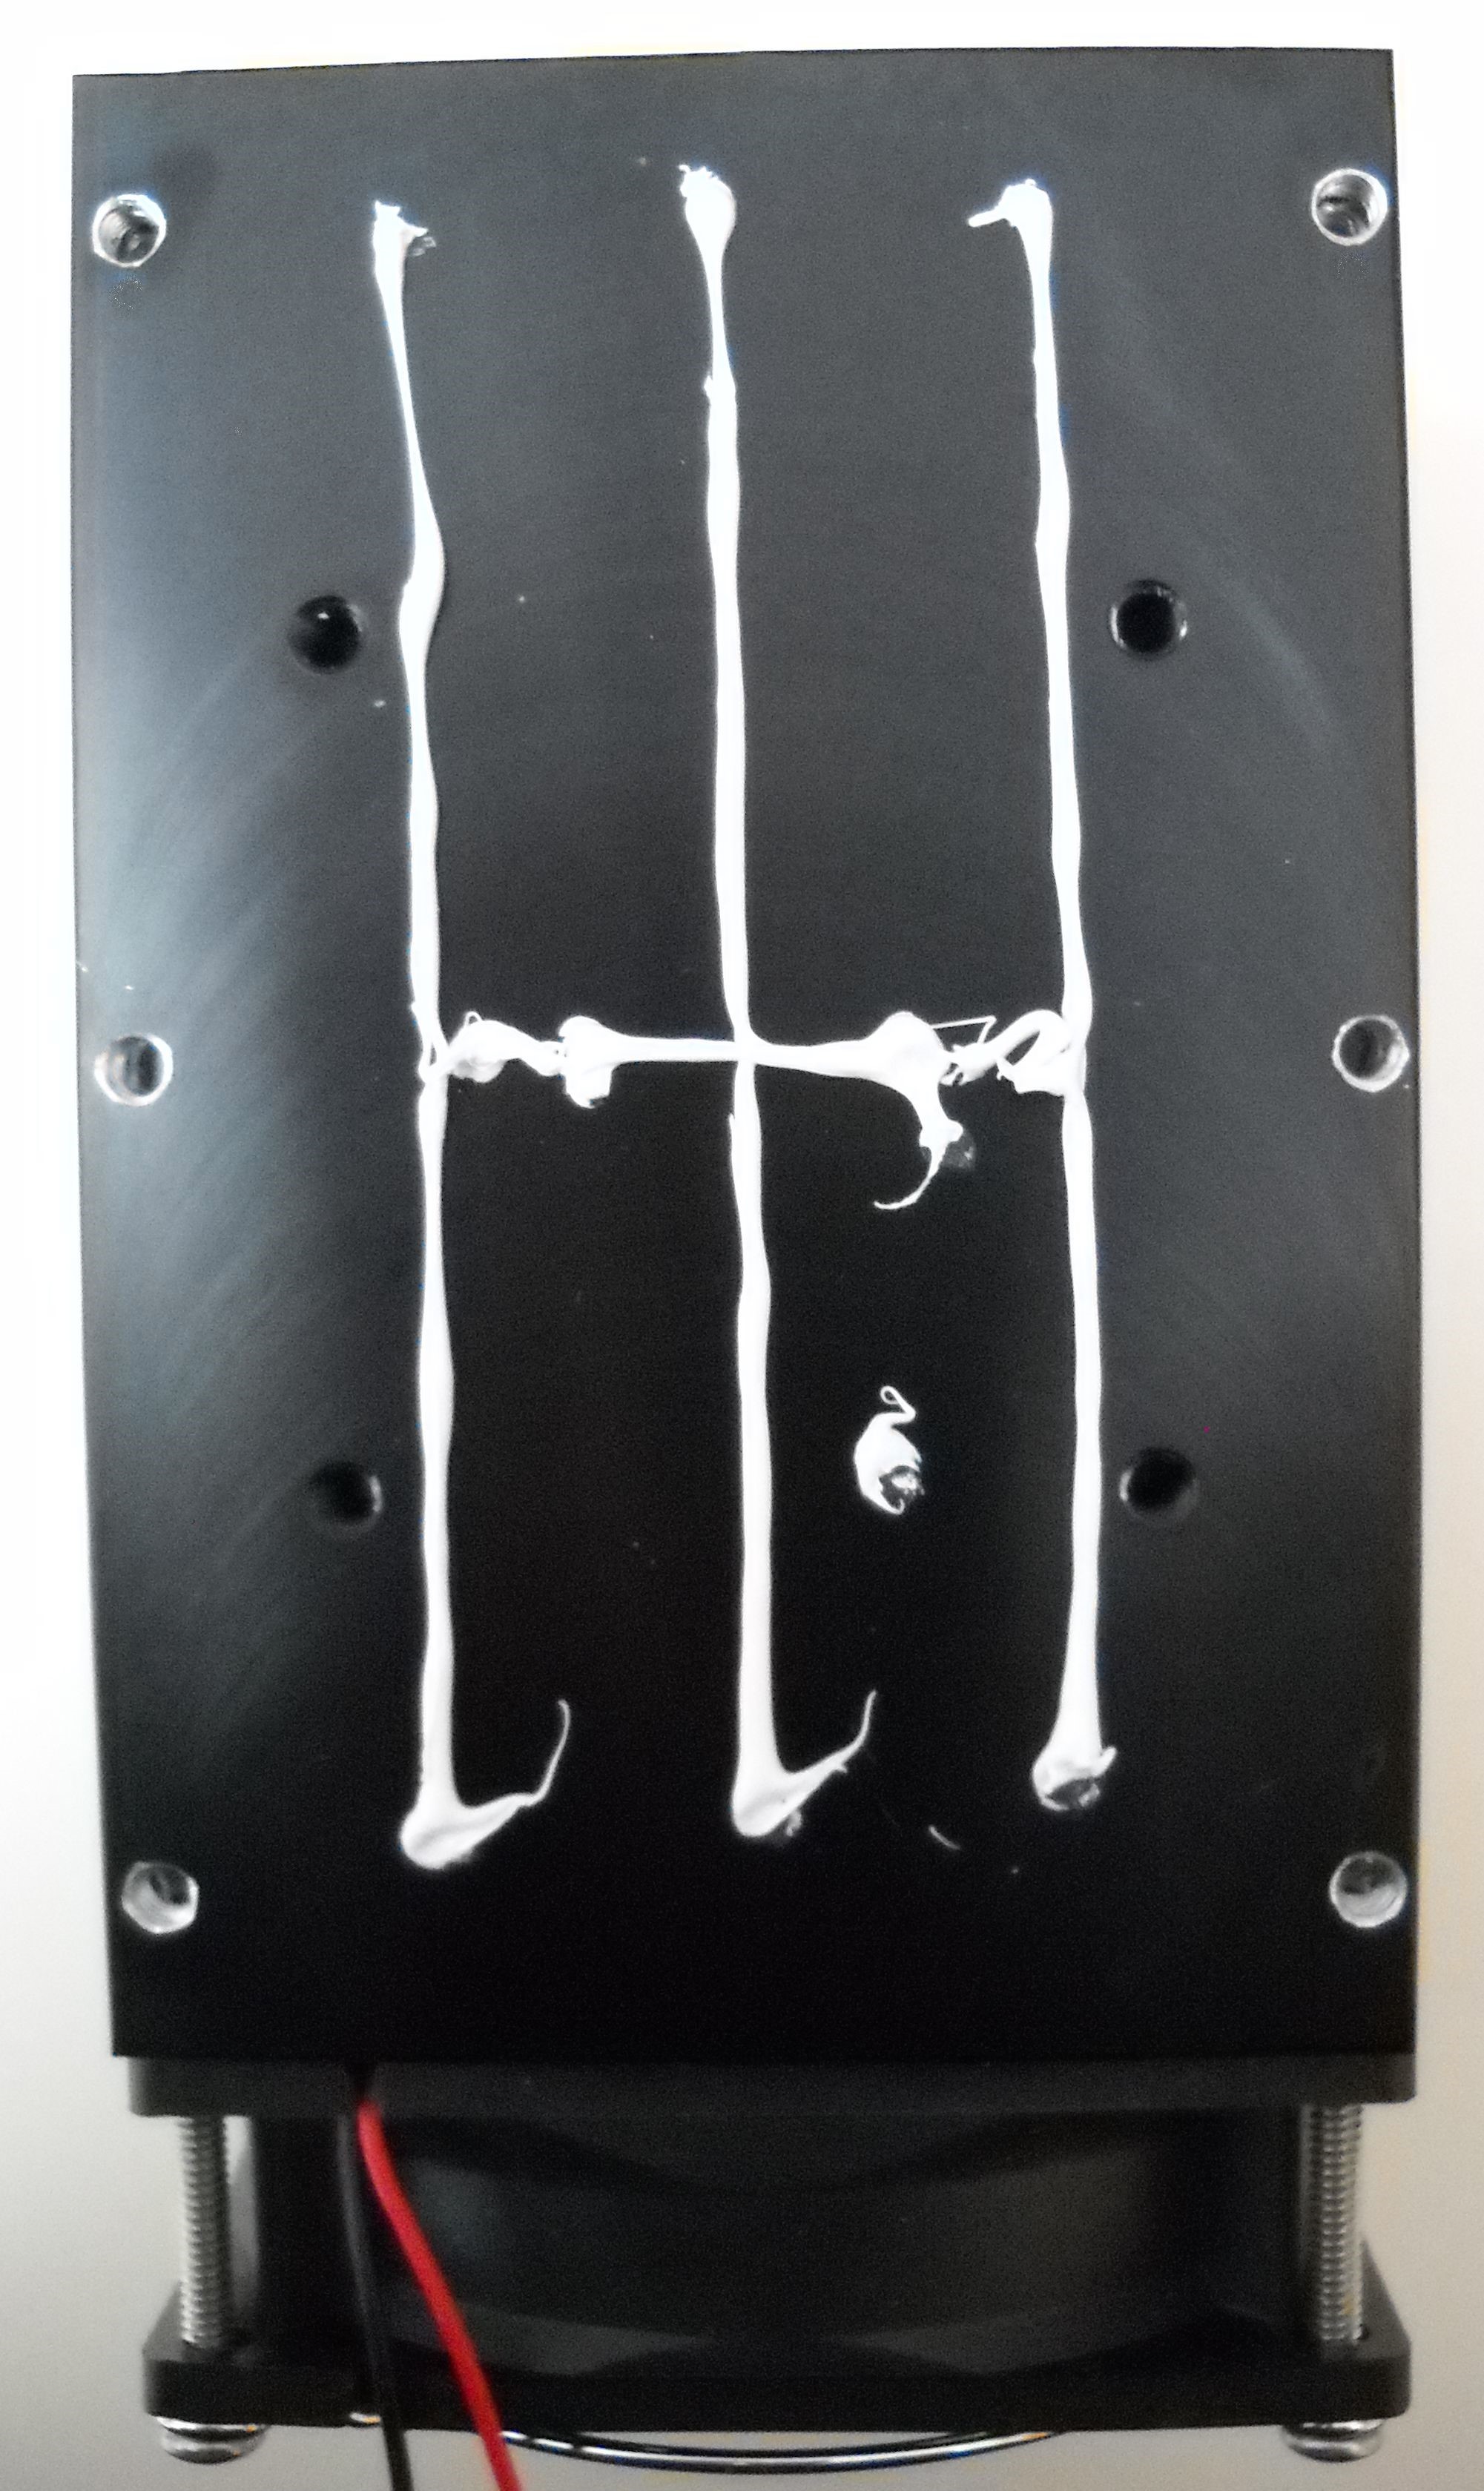 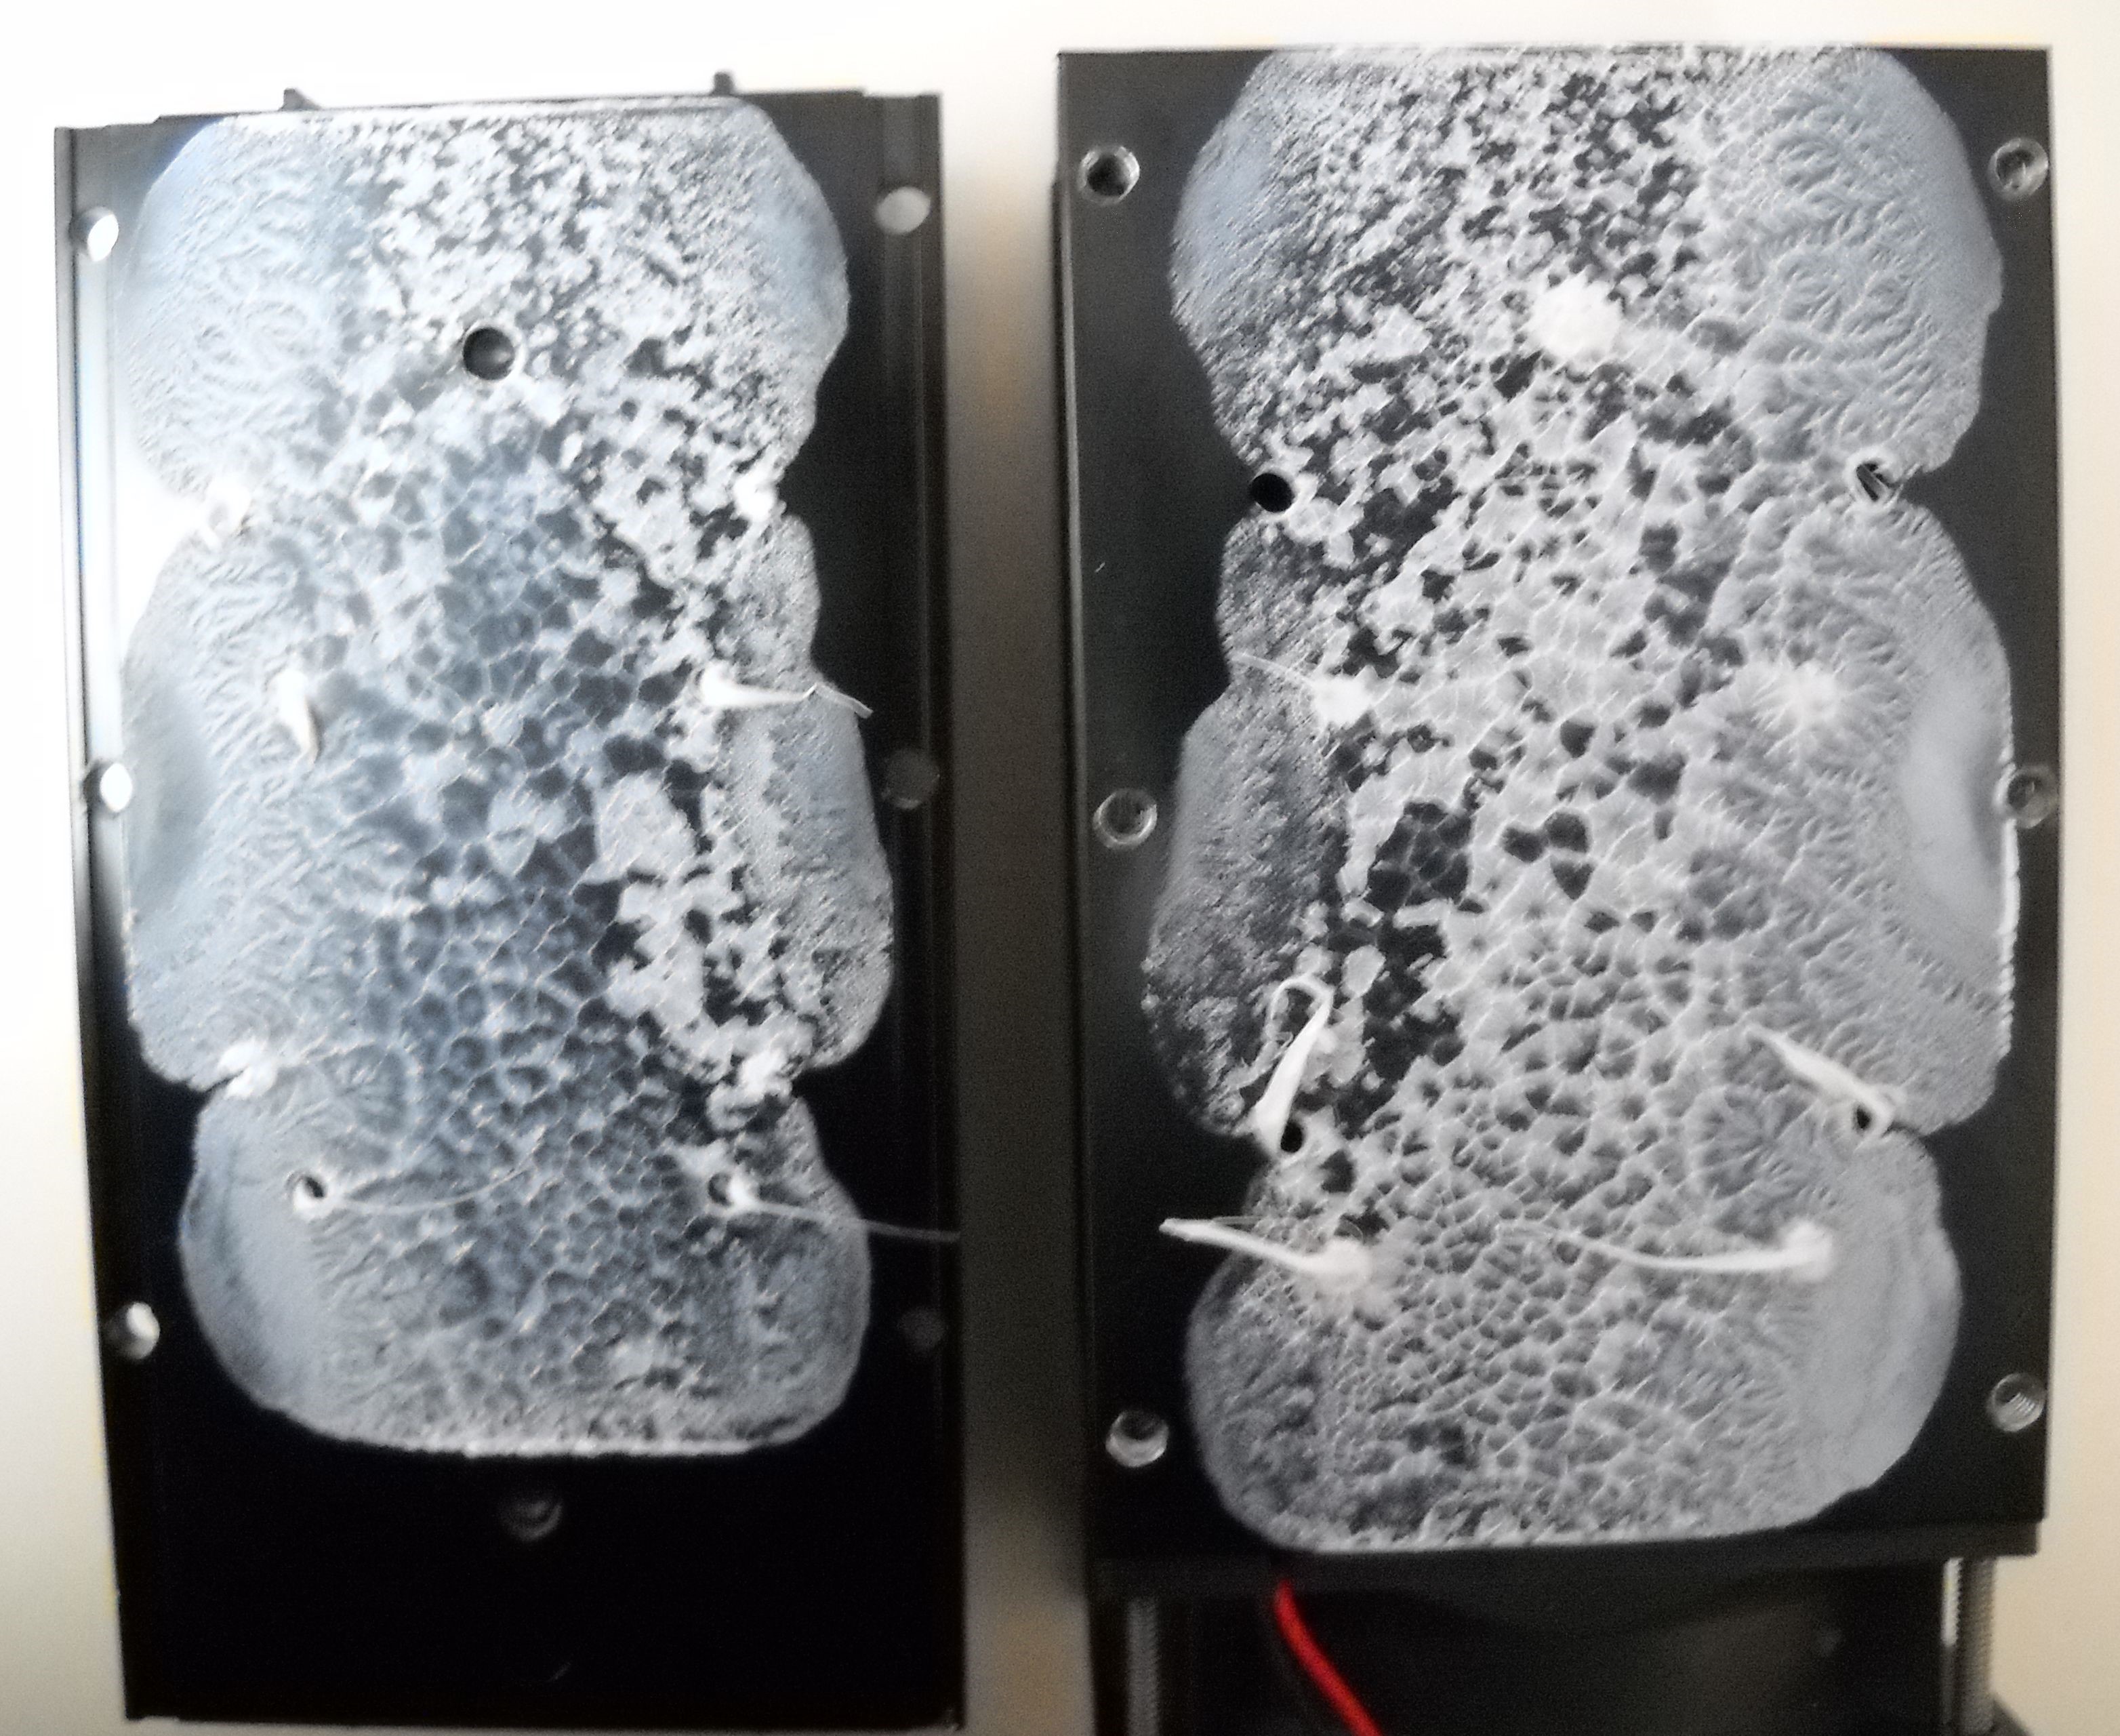 |
||
|
|